

Image revisions
Astrophotography can often be a work-in-progress of continuous refinement, as we improve our post-processing technique and learn new tricks.
Often we go back to revisit old data, to improve the post-processing. AstroBin supports multiple revisions per image, to facilitate and encourage this process.
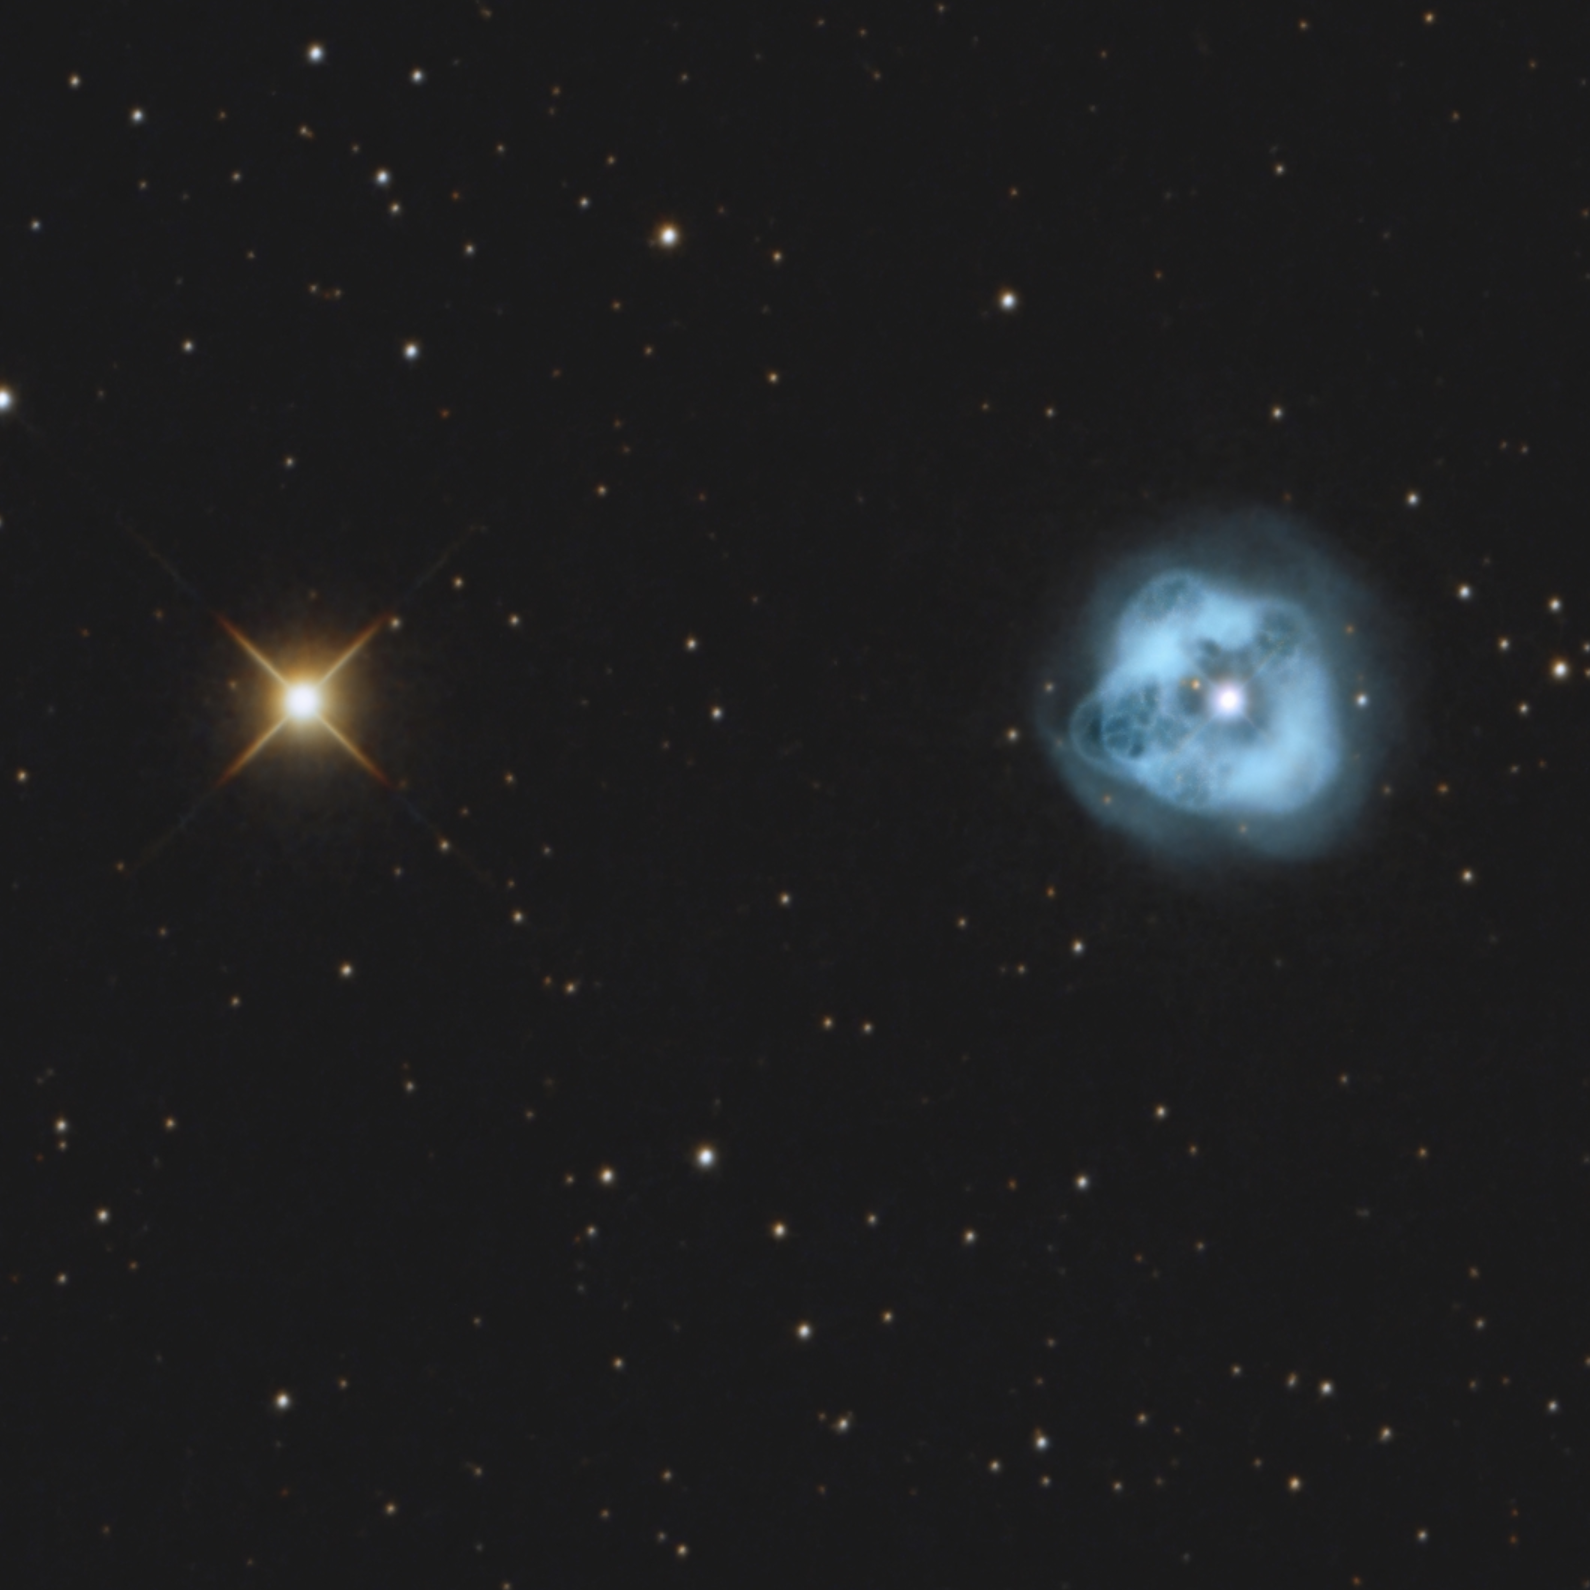
Original
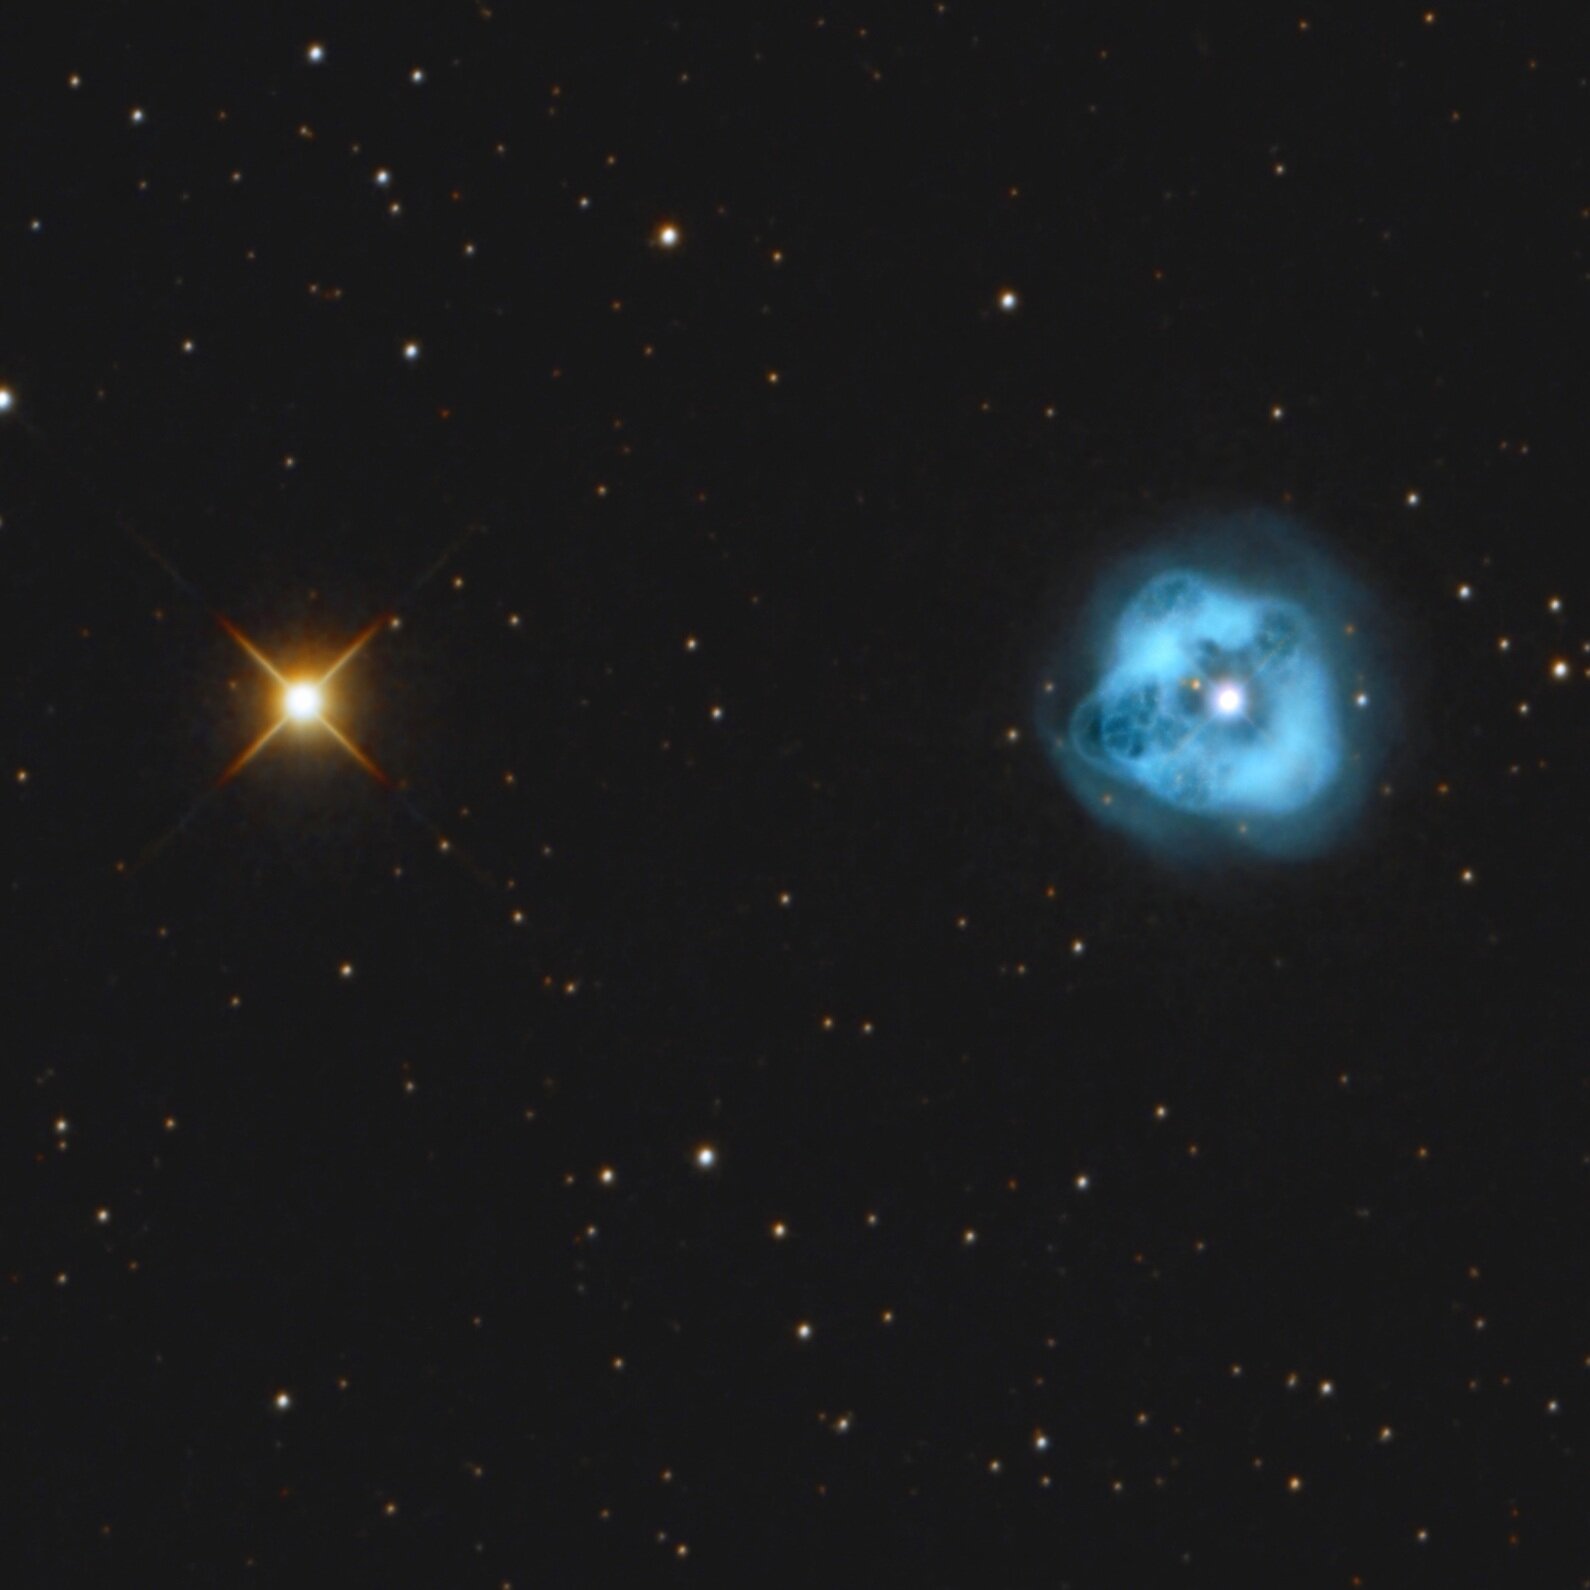
Increase contrast
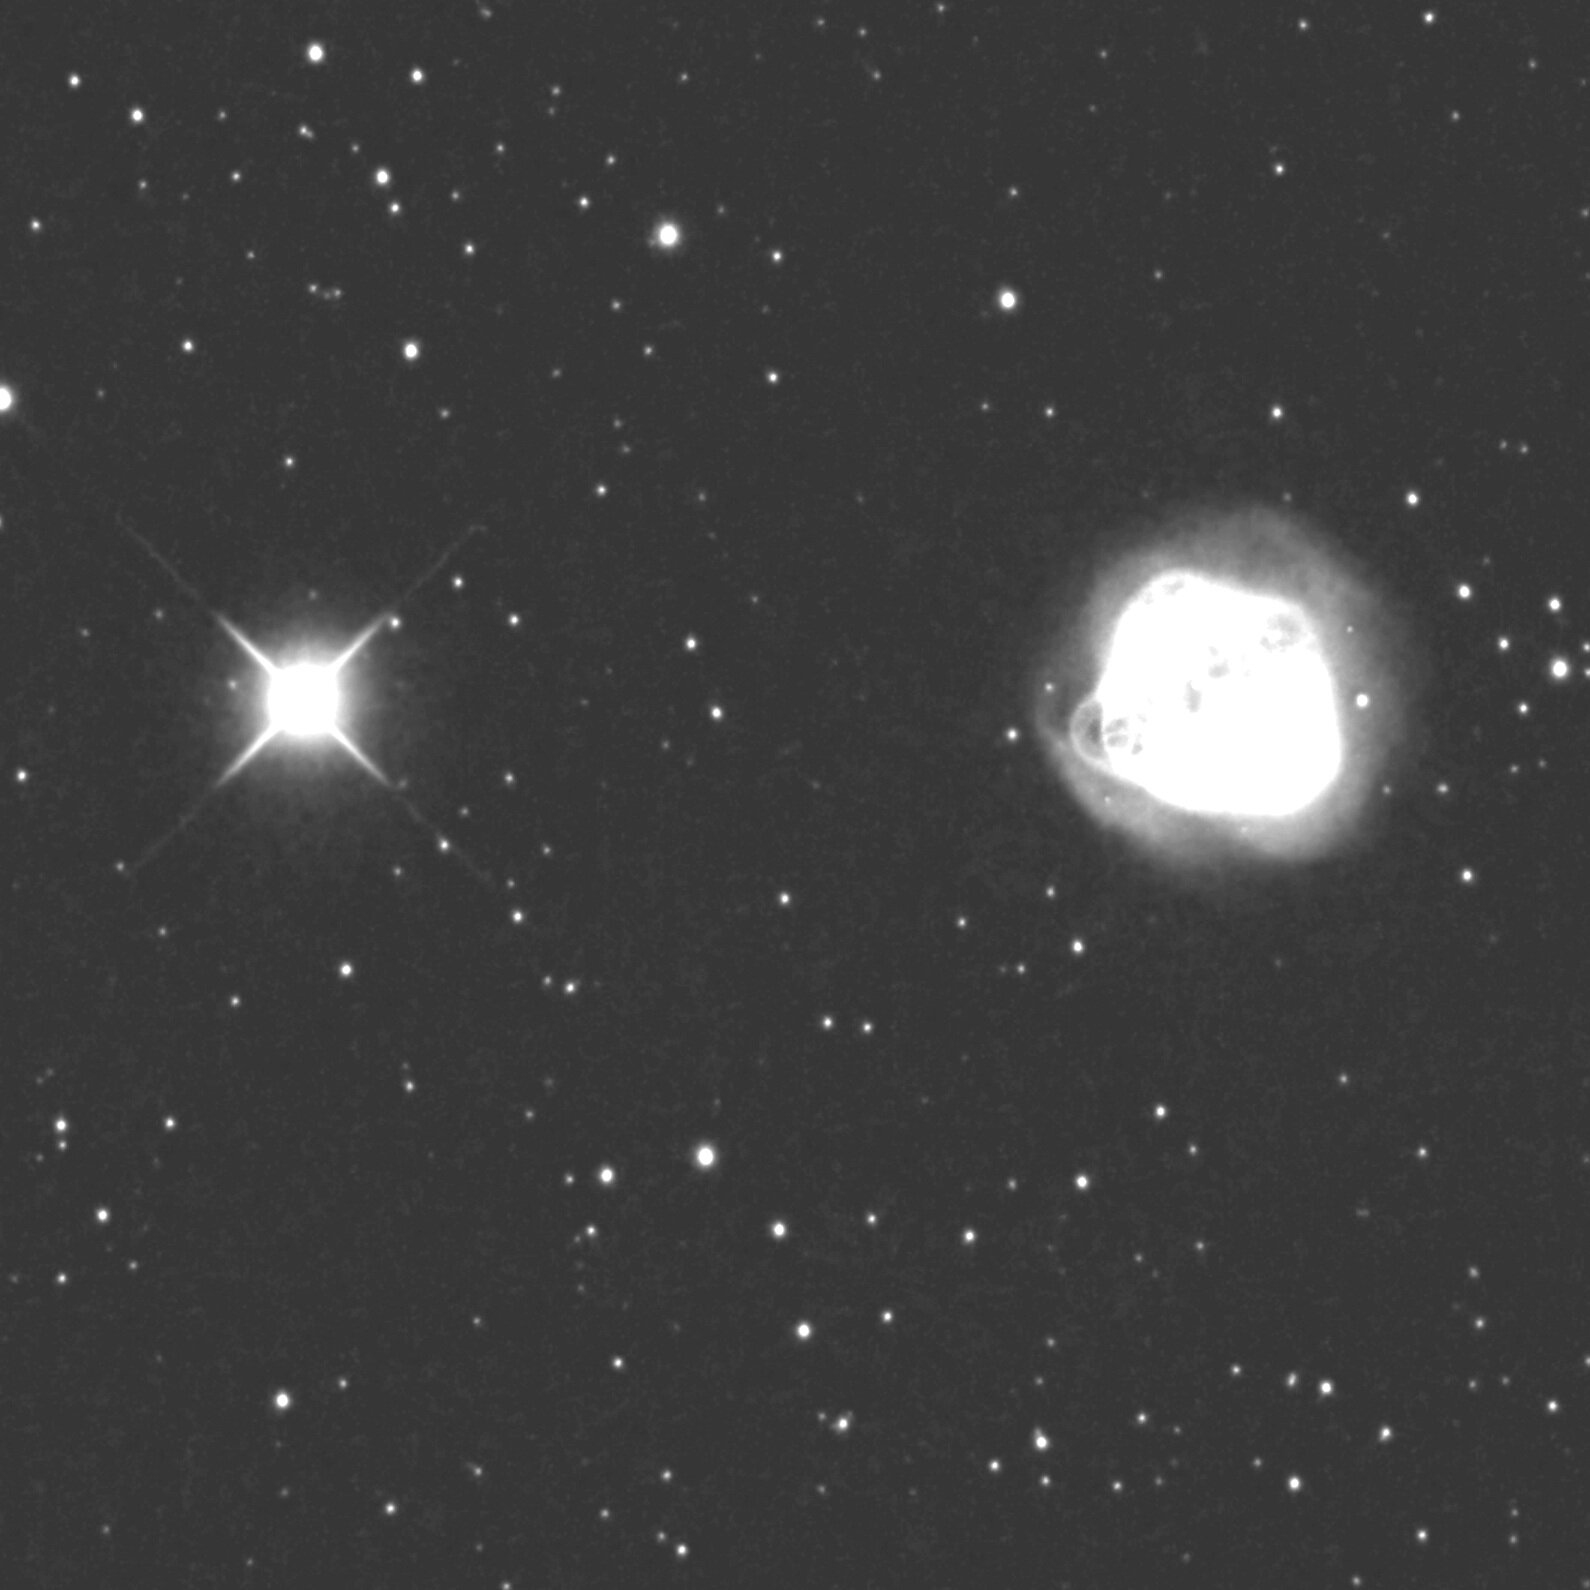
Reveal fainter structures
When should I upload a revision vs a new image?
A new image means completely new data.
You should upload a new image if:
You imaged an object you didn't previously acquire.
You imaged an object you previously published on AstroBin, but you didn't use the previous data.
You should upload a new revision if:
You added data to your previously published image.
You reprocessed data from an image you previously published on AstroBin (e.g. a different processing technique)
You want to post a crop of an image you previously published on AstroBin.
How do I upload a new revision?
Visit the image to which you want to add a revision, open the Actions menu, and chose the Upload new revision button.
How can I make a revision be the “mouse-hover” image of a different revision?
AstroBin supports multiple options for mouse-hover images:
No mouse-hover
Plate-solution annotations (if available)
Inverted monochrome
A different revision
Please note: To be able to select a different revision as mouse-hover, this revision needs to match the number of pixels (height and width) of the image that you want to set the mouse-hover of.
So if you want the Original revision to have revision B as mouse-hover, they need to have the same pixel dimensions.
To set the mouse-hover image of your Original revision:
Navigate to your image
Click the Edit menu, and select Settings
Set the “Mouse hover image” field as shown below:

If you want to set the mouse-hover of a revision (e.g. revision B has revision C as mouse-hover):
Navigate to your image
Mouse-hover the thumbnail of the revision you want to edit, so you can click on the three-dots menu
Click on Edit
Set the “Mouse hover image” field as shown below:
